Articles
How To Paint Curtains
Modified: January 9, 2024
Learn how to paint curtains with our informative articles. Find step-by-step guides and tips for creating unique and stylish designs.
(Many of the links in this article redirect to a specific reviewed product. Your purchase of these products through affiliate links helps to generate commission for Storables.com, at no extra cost. Learn more)
Introduction
Transforming plain curtains into personalized works of art is a creative way to add a unique touch to your home decor. Painting curtains allows you to unleash your artistic flair and create a stunning visual statement that reflects your style and personality. Whether you want to add a pop of color, create intricate designs, or experiment with different patterns, this DIY project provides endless possibilities.
In this article, we will guide you through the step-by-step process of painting curtains, from gathering materials to caring for your finished masterpiece. With the right techniques and a little bit of patience, you can achieve professional-looking results that will elevate the ambiance of any room.
So let’s dive in and discover how to paint curtains and unleash your inner artist!
Key Takeaways:
- Unleash Your Creativity: Painting curtains is a fun and rewarding DIY project that allows you to express your artistic flair, personalize your home decor, and create a unique visual statement.
- Long-Lasting Beauty: With proper care and maintenance, painted curtains can maintain their vibrant colors and professional-looking finish, adding a personalized touch to your living space for years to come.
Read more: How To Paint A Shower Curtain
Gathering Materials
Before you begin painting your curtains, it’s essential to gather all the necessary materials. Here’s a list of what you’ll need:
- Curtains: Choose curtains made of a natural fabric such as cotton or linen for better paint absorption. Make sure they are clean and free of any stains.
- Paint: Select fabric paint or acrylic paint specifically designed for fabric. These types of paint adhere well to fabric and offer vibrant colors.
- Paintbrushes: Opt for high-quality brushes with different sizes to accommodate both broad strokes and intricate details.
- Palette: A palette will come in handy for mixing and blending your paint colors.
- Drop Cloth or Plastic Sheets: Use these to protect your work surface from any accidental paint spills or splatters.
- Painter’s Tape: If you plan on creating sharp edges or patterns, painter’s tape will help you achieve clean lines.
- Water: Keep a container of water nearby to rinse your brushes and thin out the paint if needed.
- Paint Palette or Disposable Plates: If you don’t have a palette, disposable plates can serve as a practical alternative.
- Paper towels or Cloth: Have these on hand for wiping off excess paint or cleaning up any spills.
Once you have gathered all the necessary materials, you can proceed to the next step: preparing your curtains for painting.
Preparing the Curtains
Preparing your curtains properly before painting is crucial for achieving the best results. Follow these steps to ensure your curtains are ready:
- Remove any hardware or decorative accessories attached to the curtains, such as hooks or rings. This will provide a flat surface for painting.
- Iron the curtains to remove any wrinkles. Smooth fabric will make it easier to apply paint evenly.
- If your curtains have a lining, detach the lining from the main fabric. This will prevent the paint from bleeding onto the lining during the painting process.
- Lay the curtains flat on a clean and protected surface. Make sure the area is well-ventilated to allow proper drying.
- If there are any stains or spots on the curtains, treat them with a fabric stain remover or gentle detergent. Rinse thoroughly and air-dry before proceeding.
- Inspect the fabric for any loose threads or damages. Repair any small holes or tears using a needle and thread.
By properly preparing your curtains, you create a smooth canvas for your paint and minimize the risk of imperfections that could affect the final outcome. Once your curtains are prepped and ready, it’s time to choose the right paint for your project.
Choosing the Right Paint
When it comes to choosing the right paint for your painted curtains, there are a few factors to consider. Here are some tips to help you make the best choice:
- Fabric Paint: Fabric paint is specifically formulated to adhere to fabric fibers and provide long-lasting results. It comes in a variety of colors and finishes, such as matte or metallic, allowing you to unleash your creativity.
- Acrylic Paint: Acrylic paint can also be used for painting curtains, especially if you want a wide range of color options. However, fabric paint has an advantage in that it remains soft and flexible even after drying, whereas acrylic paint can sometimes feel stiff on fabric.
- Water Resistance: If your curtains are in an area prone to moisture or will be subjected to frequent washing, consider using fabric paint that offers water resistance or can be heat-set to improve durability.
- Opacity: Depending on your desired look, consider the opacity of the paint. Some fabric paints are more opaque, providing excellent coverage even on dark-colored curtains, while others are more translucent and work best on lighter fabrics.
- Test on a Swatch: If you are uncertain about how the paint will look on your curtains, perform a patch test on a small inconspicuous area or on a swatch of the same fabric to assess the color and texture before proceeding with the entire curtain.
Remember to read the instructions provided by the specific paint brand you choose. This will help you understand the drying time, heat-setting requirements, and any additional steps needed to ensure the longevity of your painted curtains.
Now that you have chosen the right paint, let’s move on to setting up your workspace.
Setting Up Your Workspace
Creating a well-organized and properly equipped workspace is essential for a successful curtain painting project. Here’s how to set up your workspace:
- Cover and protect your work surface: Place a drop cloth or plastic sheet to protect your table or floor from paint spills or splatters. This will make cleanup much easier.
- Ensure good ventilation: Open windows or use fans to provide proper air circulation. This will help the paint dry faster and prevent any strong paint fumes from becoming overwhelming.
- Organize your materials: Arrange your paintbrushes, paint palettes, and any other tools you may need within easy reach. This will streamline your workflow and prevent interruptions while painting.
- Set up a drying area: Find a space where you can hang or lay the painted curtains flat to dry without them touching each other or any other surfaces. This will ensure that the paint dries evenly without smudging.
- Protect the surrounding area: If you are working indoors, consider hanging plastic sheets or using painter’s tape to protect nearby walls, furniture, or decor from accidental paint splatters.
By setting up a well-organized workspace, you can focus on your painting without the worry of damaging your surroundings or disrupting your creative flow. Once your workspace is ready, it’s time to move on to the next step: priming the curtains.
Read more: How To Hang Curtain Lights Over Curtains
Priming the Curtains
Priming your curtains before painting can help improve the adhesion of the paint, enhance color vibrancy, and provide a smoother finish. Here’s how to prime your curtains:
- Choose a fabric primer: Look for a fabric primer specifically designed for painting projects. This will help the paint adhere better to the fabric surface.
- Read and follow the instructions: Before applying the primer, carefully read the instructions provided by the manufacturer. Different primers may have specific drying times or application techniques.
- Prepare your workspace: Make sure your workspace is clean and free of dust or debris that could interfere with the priming process.
- Lay the curtains flat: Lay the curtains flat on your protected work surface to ensure an even application of primer.
- Stir the primer: Stir the fabric primer well to ensure it is thoroughly mixed and ready for use.
- Apply the primer: Use a paintbrush or a foam roller to apply a thin and even layer of primer onto the curtains. Work in small sections, starting from one corner and moving outward.
- Allow the primer to dry: Follow the drying time indicated on the primer’s instructions. It is usually recommended to let it dry for at least 24 hours or as specified by the manufacturer.
- Inspect and repeat if necessary: After the primer has dried, examine the curtains for any areas that may require an additional coat of primer. Apply a second coat if needed.
Priming your curtains will create a solid base for the paint, ensuring better adhesion, durability, and a more vibrant finished result. Once the primer is dry, you are ready to move on to the exciting part: mixing and preparing the paint!
Mixing and Preparing the Paint
Before you start painting your curtains, it’s important to mix and prepare the paint properly. Here are the steps to follow:
- Choose your colors: Select the colors you want to use for your curtains. Consider your overall color scheme and the mood you want to create in the room.
- Squeeze out the paint: Squeeze a small amount of each color onto your paint palette or disposable plate. Start with a conservative amount and add more as needed.
- Stir the paint: Use a paintbrush or palette knife to stir each color thoroughly, making sure there are no lumps or inconsistencies.
- Test the paint consistency: Dip your paintbrush into the mixed paint and test it on a small area of fabric. The paint should have a smooth consistency and should not be too thick or too thin.
- Thin the paint if necessary: If the paint seems too thick, you can thin it down by adding a few drops of water or a fabric medium, following the instructions provided by the paint manufacturer.
- Blend colors if desired: If you want to create custom colors or gradients, mix different paint colors together on your palette until you achieve the desired shade.
By taking the time to properly mix and prepare your paint, you ensure consistent coverage and vibrant colors on your curtains. Once your paint is ready, it’s time to unleash your creativity and start applying it to the fabric.
When painting curtains, use fabric paint or mix fabric medium with acrylic paint to ensure the color stays vibrant and doesn’t stiffen the fabric. Always test a small area first.
Painting Techniques
When it comes to painting your curtains, there are various techniques you can use to achieve different effects and designs. Here are some popular techniques to consider:
- Brush painting: This is the most common technique, where you use a paintbrush to apply the paint directly onto the fabric. Brush strokes can be broad and loose or precise and controlled, depending on the desired effect.
- Splatter painting: For a fun and artistic approach, you can create splatter effects by loading your brush with paint and flicking it onto the fabric. This technique adds texture and a playful touch to your curtains.
- Stenciling: Stenciling allows you to create intricate patterns or designs on your curtains. Use pre-cut stencils or create your own by cutting out shapes from cardboard or acetate sheets. Place the stencil onto the fabric and apply paint over it using a brush or sponge.
- Gradient painting: A gradient effect can be achieved by blending two or more paint colors together smoothly. Start with one color at the top or bottom of the curtain and gradually blend it into another color. This creates a beautiful transition of colors.
- Block printing: Block printing involves using a carved block or stamp to transfer paint onto the fabric. Apply the paint onto the block, press it firmly onto the fabric, and lift it off to reveal the design. Repeat the process to create a repeated pattern.
- Freehand painting: If you’re confident in your artistic abilities, you can simply freehand paint any design or pattern directly onto the fabric. This allows for the greatest creativity and personalization.
Experiment with different painting techniques to create unique and visually stunning curtains that reflect your own style and taste. Remember to allow each layer of paint to dry completely before applying another layer or using a different technique.
Now that you’re familiar with various painting techniques, let’s move on to applying the base color onto your curtains.
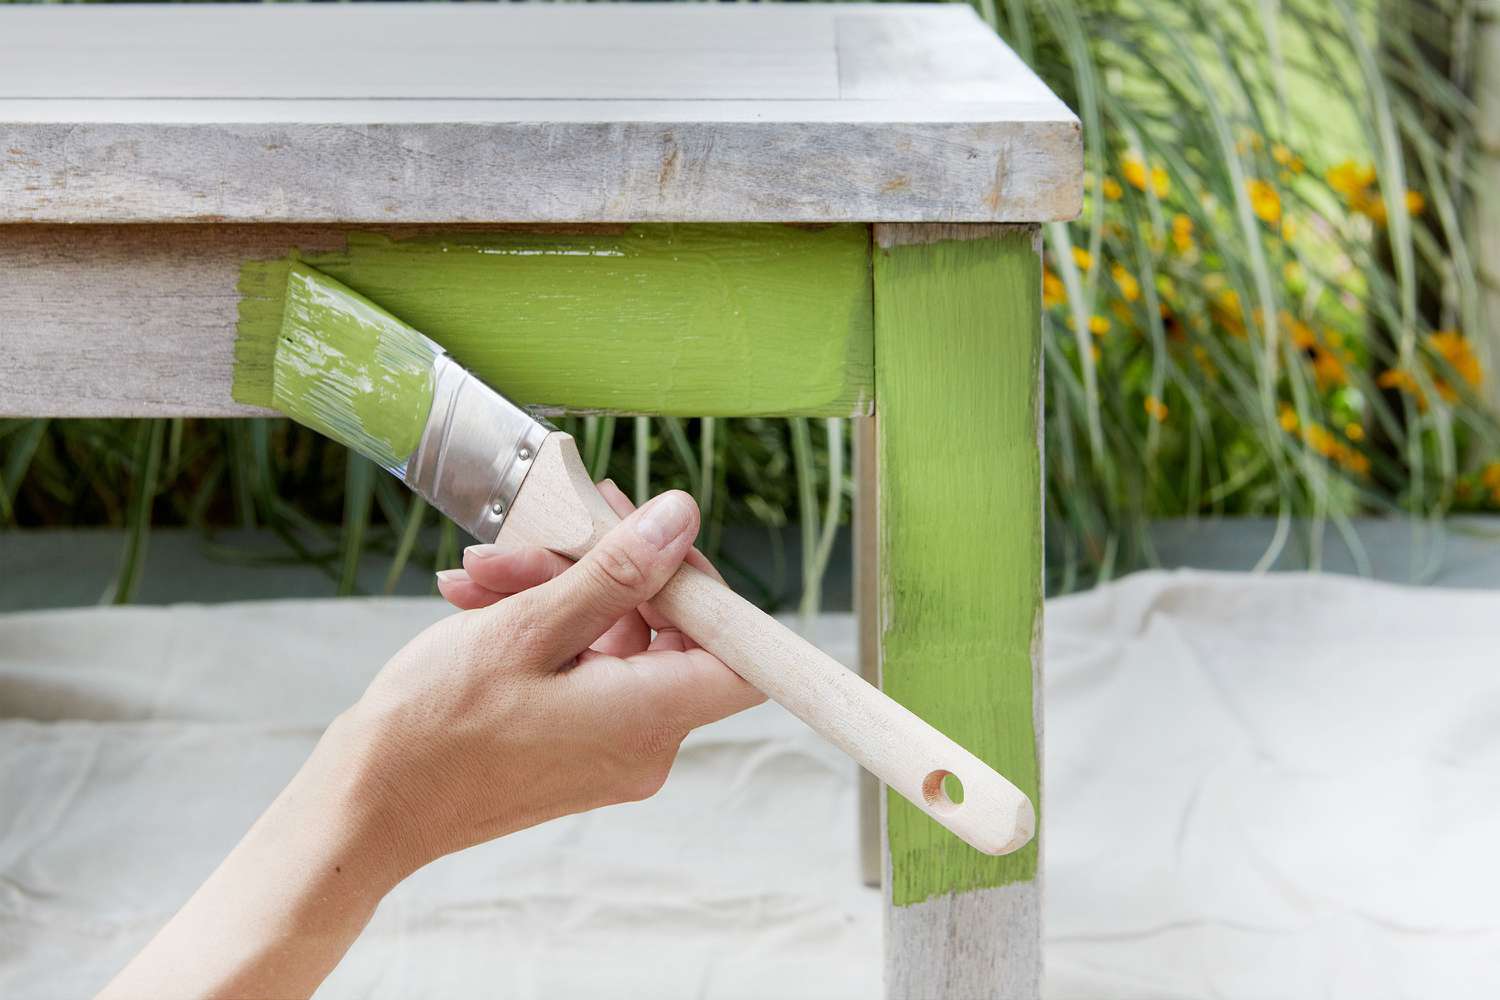
Applying the Base Color
Applying the base color is the first step in adding paint to your curtains. This step provides a foundation for your design and sets the tone for the overall look. Here’s how to apply the base color:
- Choose your base color: Select the color that will serve as the primary color for your curtains. This could be a bold statement color or a neutral shade that complements your existing decor.
- Prepare your paint: Ensure that your base color paint is well-mixed and at the desired consistency. If necessary, thin the paint with water or a fabric medium to achieve a smoother application.
- Start at one end: Begin applying the base color paint at one end of the curtain. Use your chosen painting technique, such as brush painting or sponge painting, to evenly distribute the paint across the fabric.
- Work in small sections: Divide the curtain into manageable sections and focus on one section at a time. This will help you maintain control over the paint application and ensure an even coat.
- Apply multiple coats if needed: Depending on the opacity of your chosen paint and the desired depth of color, you may need to apply multiple coats. Allow each coat to dry completely before applying the next.
- Blend the edges: To avoid harsh lines, gently blend the edges of each section with the surrounding areas while the paint is still wet. This will create a smoother transition between sections.
- Inspect for even coverage: Once you have finished applying the base color, step back and inspect the curtains for any areas that may need touch-ups or additional coats. Make sure the base color is evenly distributed across the entire fabric.
Remember, the base color sets the stage for your design, so take your time and ensure a thorough and even application. Once you are satisfied with the base color, you can move on to the next step: adding patterns or designs to your painted curtains.
Read more: How To Change Curtains
Adding Patterns or Designs
Adding patterns or designs to your painted curtains is an exciting way to elevate their visual appeal and customize them to your liking. Here are some methods to consider:
- Freehand painting: Use a fine-tipped paintbrush and your artistic skills to paint intricate designs directly onto the fabric. This allows for unlimited creativity and personalization.
- Stenciling: Stencils can be used to create precise and repeatable patterns. Secure the stencil onto the fabric and apply paint using a brush or sponge, following the contours of the stencil design.
- Stamping: Use rubber stamps or carved blocks to apply designs onto the fabric. Dip the stamp into paint and press it firmly onto the fabric, then lift it off to reveal the design.
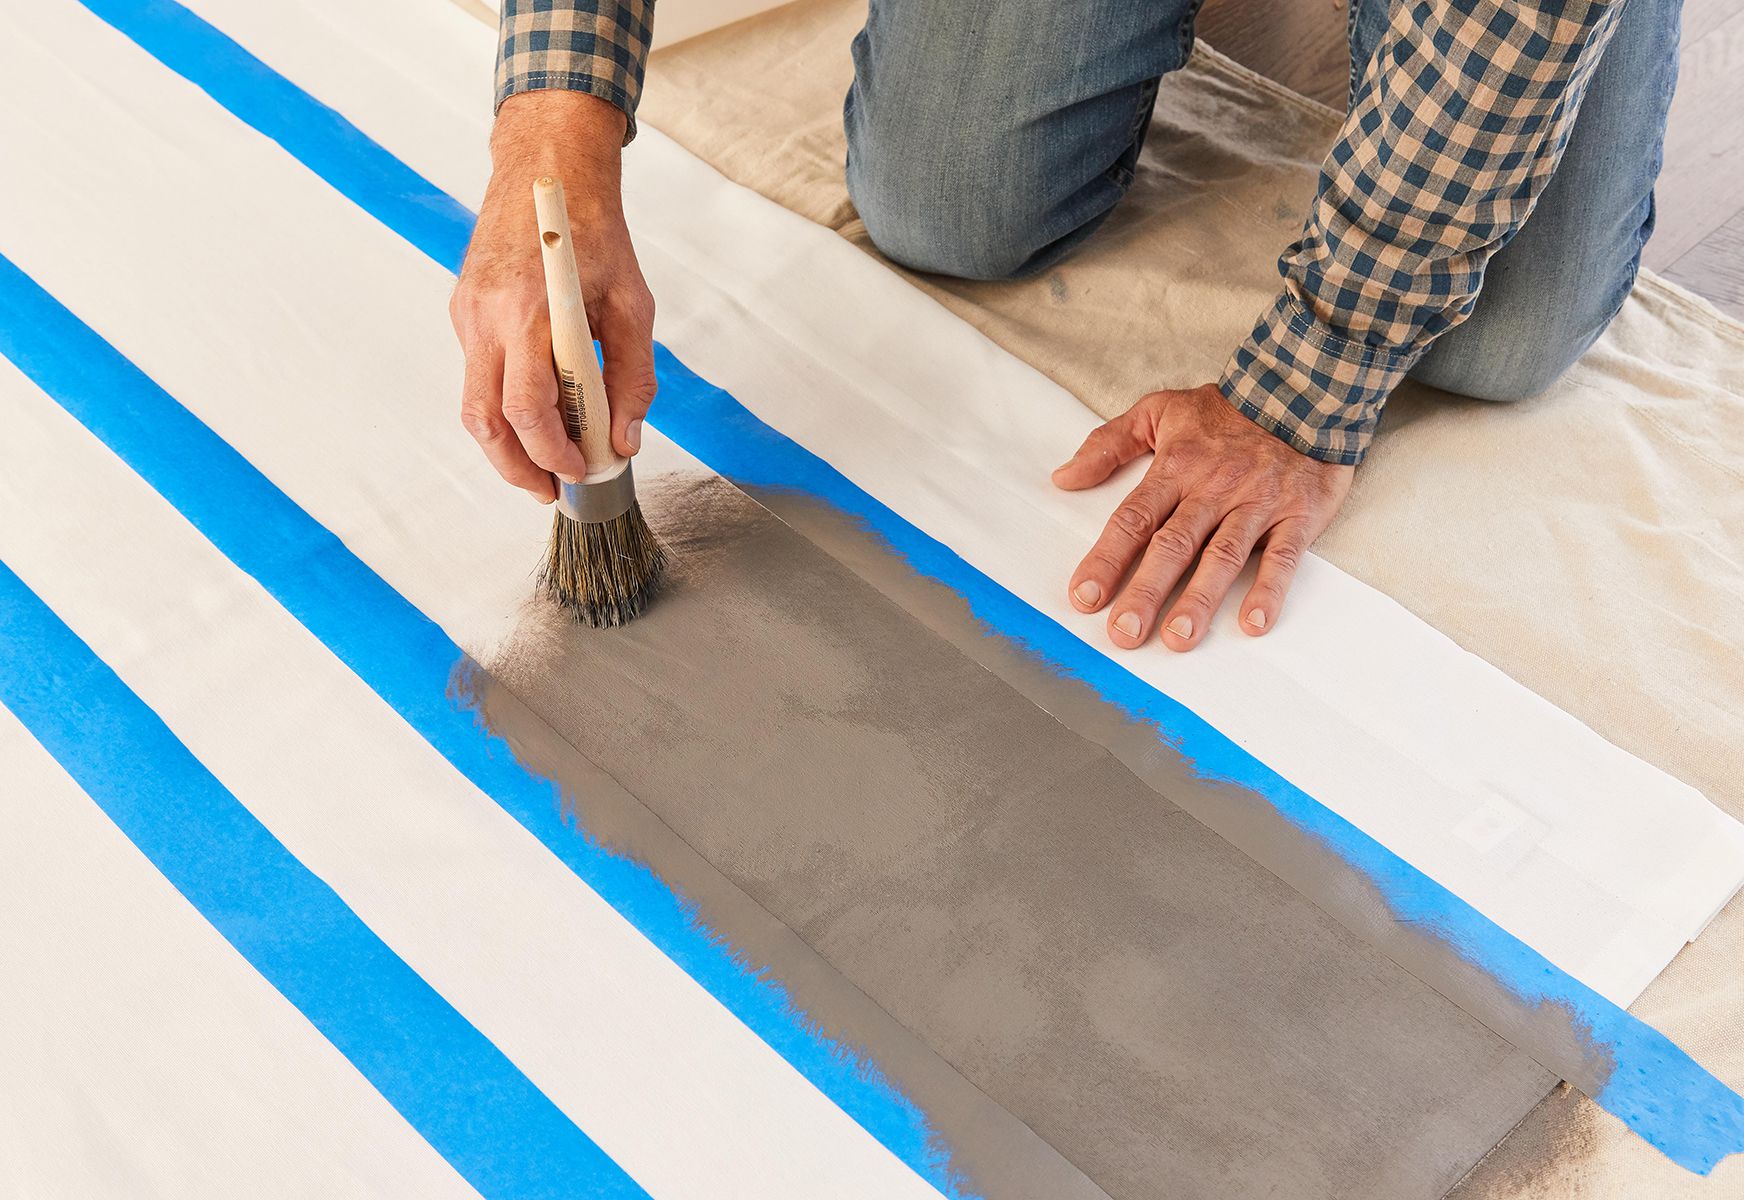
- Tape masking: Create sharp and clean lines by using painter’s tape or masking tape to mask off sections of the curtain. Paint over the tape, and once it’s dry, remove the tape to reveal the crisp design.
- Gradient effects: Blend multiple paint colors to create gradient effects on your curtains. Use a sponge or a blending brush to smoothly merge the colors together, creating a beautiful transition from one shade to another.
- Geometric shapes: Mask off areas of the curtain using tape or stencils to create geometric shapes such as stripes, triangles, or chevron patterns. Fill in the masked areas with paint and remove the tape or stencil when dry.
When adding patterns or designs, it’s important to have a clear plan in mind. Consider sketching your design on paper or creating a digital mock-up before applying it to the fabric. This will help you visualize the final result and make any necessary adjustments.
Feel free to mix and match different techniques to achieve unique and eye-catching designs. Let your creativity shine through as you express your personal style on your painted curtains.
Once you’re satisfied with the patterns or designs, it’s time to move on to the next step: blending colors for added visual interest.
Blending Colors
Blending colors on your painted curtains can add depth, dimension, and visual interest to your designs. It allows you to create smooth transitions between different hues and create captivating gradients. Here’s how you can blend colors effectively:
- Choose your colors: Select two or more paint colors that you want to blend together. Consider colors that complement each other or create a harmonious color scheme.
- Prepare your paint: Make sure your chosen colors are mixed and prepared at the desired consistency. Adjust the paint’s thickness if necessary by adding a small amount of water or fabric medium.
- Start with a base color: Apply one of the colors as your base coat on the fabric. This will serve as the foundation and provide a starting point for the blending process.
- Apply the second color: On a separate area of the fabric or overlapping the base color, apply the second color using a brush, sponge, or blending brush. Blend the edges of the two colors together while the paint is still wet to create a seamless transition.
- Layer and blend: If using more than two colors, continue applying and blending the subsequent colors using the same technique as the previous step. Layer the colors gradually, ensuring a smooth transition between each shade.
- Blend with a dry brush or sponge: To achieve a softer blend, use a dry brush or sponge to gently blend the colors together. This technique works best when the paint is still wet or slightly tacky.
- Step back and assess: Step away from your work occasionally to assess the overall blending effect. Make any necessary adjustments or add additional layers to create the desired blending result.
The key to successful color blending is to work patiently and smoothly, ensuring that the colors transition seamlessly from one to the next. Take your time to experiment and find the blending technique that achieves the look you envision.
Once you have achieved the desired blend of colors, allow the paint to dry completely before moving on to the next step in the process.
Drying and Finishing the Curtains
After you have completed the painting process, it’s crucial to allow your curtains to dry thoroughly before handling or hanging them. Here’s what you need to do to ensure proper drying and finishing:
- Follow the paint manufacturer’s recommendations: Different paint types and brands have different drying times indicated on their packaging. Follow the instructions provided to allow ample drying time for your specific paint.
- Hang the curtains to dry: Once the curtains have dried to the touch, hang them up on a clothesline or a drying rack. This will help prevent any smudging or imprints from contact with other surfaces.
- Avoid direct sunlight: Hang the curtains in an area away from direct sunlight, as prolonged exposure to sunlight can cause fading or discoloration of the paint.
- Allow for sufficient airflow: Ensure that the drying area is well-ventilated to facilitate faster drying. Use fans or open windows to create a breeze if necessary.
- Inspect for any touch-ups: After the curtains have dried completely, inspect them for any areas that may require touch-ups. Use a small brush to carefully touch up any imperfections in the paint.
- Consider heat-setting: Depending on the type of fabric paint you used, heat-setting may be necessary to enhance the durability of the painted design. Follow the instructions provided by the paint manufacturer for heat-setting methods.
- Iron if needed: Once the curtains are fully dry and heat-set if required, you can lightly iron them on the reverse side to remove any remaining wrinkles or creases.
- Hang and enjoy: Finally, hang your beautifully painted curtains in your desired location. Step back and admire your handiwork as the curtains add a personalized touch to your living space.
By allowing the paint to dry properly and taking the necessary steps for finishing, you can ensure a long-lasting and professional-looking result for your painted curtains.
Now, let’s move on to the final section: caring for your painted curtains to maintain their beauty over time.
Caring for Painted Curtains
Proper care is essential to maintain the vibrant colors and longevity of your painted curtains. Follow these guidelines to ensure they stay in great condition:
- Read the care instructions: Always refer to the care instructions provided by the paint manufacturer. They may have specific recommendations for washing and maintaining painted fabrics.
- Gentle hand washing: If your painted curtains are washable, gently hand wash them in cold water using a mild detergent. Avoid scrubbing too vigorously to prevent any damage to the painted design.
- Avoid harsh chemicals: Avoid using harsh cleaning agents, bleach, or stain removers on your painted curtains as they may cause the colors to fade or bleed. Stick to gentle, fabric-friendly products.
- Air drying: After washing, hang the curtains to air dry or lay them flat on a clean surface. Avoid putting them in the dryer, as the heat may damage the paint or cause it to crack.
- Handle with care: When handling your painted curtains, be gentle to avoid rubbing or scraping the painted surface against rough surfaces or objects that could damage the design.
- Avoid direct sunlight: Overexposure to direct sunlight can cause the paint colors to fade over time. If possible, hang your curtains away from sunlight or use window treatments to protect them.
- Store properly: If you need to store your painted curtains, make sure they are completely dry and clean. Fold them gently and place them in a cool, dry place, away from moisture and insects.
- Spot clean when needed: If there are small spots or stains on your curtains, spot clean them with a gentle cleaner and a soft cloth. Blot the stain gently instead of rubbing to prevent any damage to the paint.
- Regularly inspect: Periodically check your painted curtains for any signs of wear or damage. If you notice any peeling or cracking of the paint, consider touch-ups to preserve the appearance.
By following these care instructions, you can ensure that your painted curtains remain vibrant and beautiful for years to come.
With proper care and maintenance, you can enjoy the unique and personalized touch that painted curtains bring to your home for a long time.
Now that you have all the information needed to paint and care for your curtains, it’s time to unleash your creativity and transform your space with this DIY project!
Read more: How To Put Curtains
Conclusion
Transforming plain curtains into works of art through painting is a creative and rewarding project. By following the steps outlined in this guide, you can unleash your creativity, add a personalized touch to your home decor, and showcase your artistic skills.
We started by gathering the necessary materials and preparing the curtains for painting. Then, we discussed the importance of choosing the right paint and setting up a well-organized workspace. The process involved priming the curtains, mixing and preparing the paint, and applying the base color. We explored various painting techniques, including adding patterns or designs, blending colors, and discussed the importance of allowing the curtains to dry properly.
Additionally, we provided guidelines for caring for your painted curtains, ensuring their longevity and vibrant appearance over time. By following these care instructions and handling your curtains with care, you can enjoy their beauty for years to come.
Painting curtains allows you to let your imagination run wild and create a unique focal point in any room. Whether you prefer bold and vibrant colors, subtle gradients, or intricate designs, this DIY project allows you to express your style and add a personal touch to your living space.
Now that you have all the knowledge and guidance you need, it’s time to gather your materials, unleash your inner artist, and enjoy the process of painting your curtains. Get creative, experiment with different techniques, and bring your vision to life. Embrace the joy of transforming ordinary curtains into extraordinary pieces of art!
Frequently Asked Questions about How To Paint Curtains
Was this page helpful?
At Storables.com, we guarantee accurate and reliable information. Our content, validated by Expert Board Contributors, is crafted following stringent Editorial Policies. We're committed to providing you with well-researched, expert-backed insights for all your informational needs.
0 thoughts on “How To Paint Curtains”