Home>Furniture>Living Room Furniture>How To Make A Simple Wooden Coffee Table
Living Room Furniture
How To Make A Simple Wooden Coffee Table
Modified: March 16, 2024
Learn how to easily create a beautiful and functional wooden coffee table for your living room. Enhance your living space with this simple DIY project.
(Many of the links in this article redirect to a specific reviewed product. Your purchase of these products through affiliate links helps to generate commission for Storables.com, at no extra cost. Learn more)
Introduction
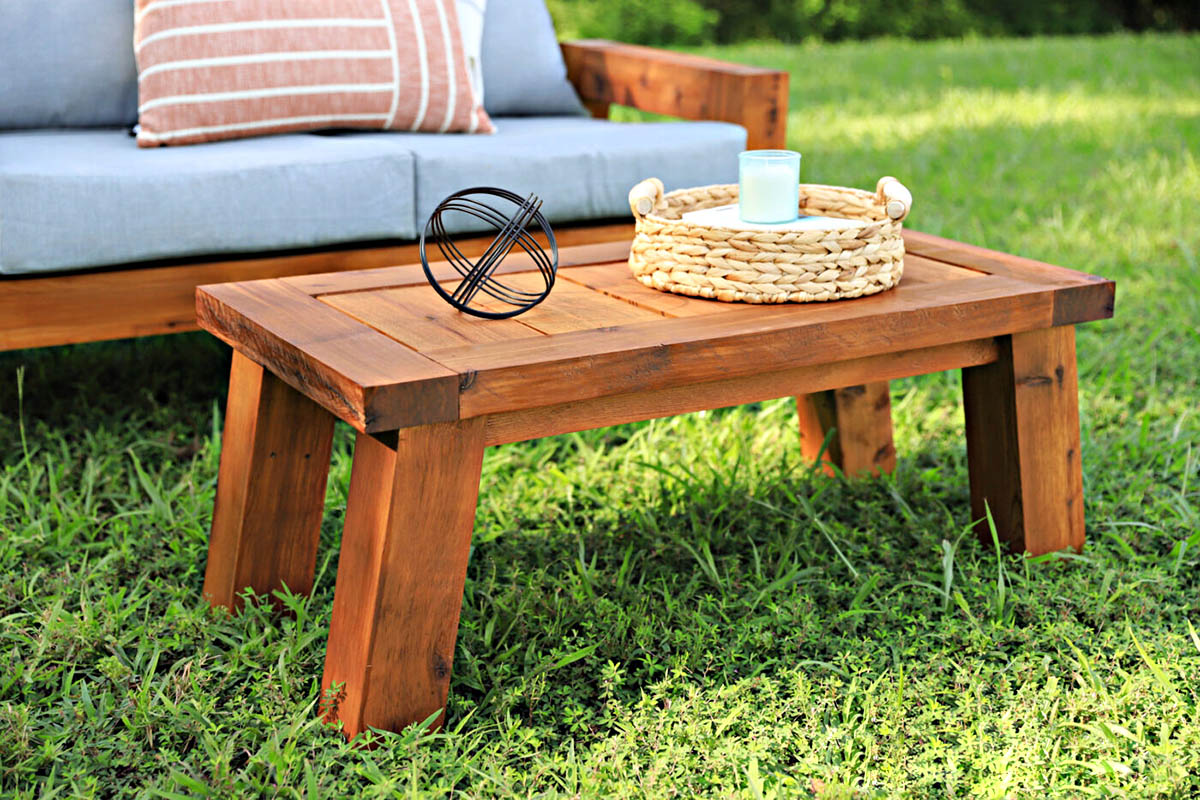
Welcome to our guide on how to make a simple wooden coffee table! If you’re looking to add a personal touch to your living room furniture and showcase your woodworking skills, building your own coffee table is a rewarding project to undertake. Not only will it save you money, but it will also allow you to customize the design and dimensions to fit your specific needs.
In this step-by-step guide, we will walk you through the process of creating a basic wooden coffee table. Whether you’re a seasoned woodworker or a complete beginner, this project is suitable for anyone willing to put in a little time and effort. So let’s dive in and get started!
Key Takeaways:
- Building a wooden coffee table is a rewarding DIY project that allows you to customize the design and dimensions. With the right materials and steps, anyone can create a personalized piece of furniture for their living room.
- From measuring and cutting the wood to assembling and finishing the table, this guide provides a step-by-step process for creating a sturdy and stylish coffee table. It’s a fun and practical way to showcase woodworking skills.
Read more: How To Clean A Wooden Coffee Table
Materials Needed
Before you begin building your wooden coffee table, it’s important to gather all the necessary materials. Here’s a list of what you’ll need:
- Wood: Choose a high-quality solid wood, such as pine, oak, or walnut, for the tabletop and legs. The dimensions will depend on the size of the table you want to build.
- Measuring tape: This will be essential for accurately measuring the wood pieces.
- Saw: A circular saw or miter saw will be needed to cut the wood to the desired lengths.
- Sandpaper: Different grits of sandpaper (ranging from fine to coarse) will be necessary to smooth the wood surfaces.
- Screwdriver or drill: You’ll need either a screwdriver or drill (with appropriate drill bits) to secure the tabletop and legs together.
- Screws: Opt for screws that are long enough to securely fasten the tabletop to the legs.
- Wood glue: This will help reinforce the joints and provide extra stability to the table.
- Paint or stain (optional): If you want to add a splash of color or protect the wood, consider using paint or stain of your choice.
- Brushes or applicators: These will be required if you decide to paint or stain the table.
- Protective finish (optional): Applying a protective finish, such as polyurethane or varnish, will protect the wood from moisture, scratches, and wear and tear.
Make sure to gather all these materials before you start the project. Having everything on hand will ensure a smoother and more efficient building process.
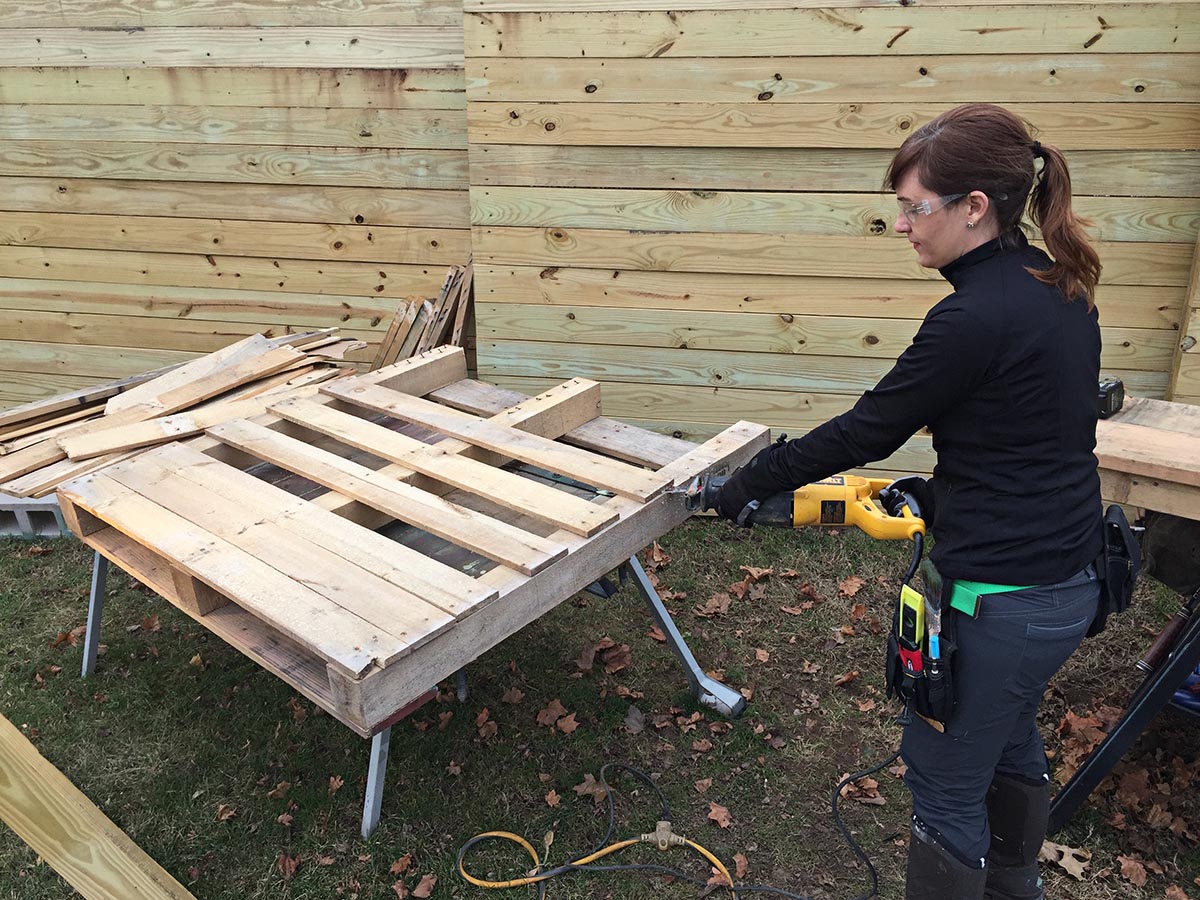
Step 1: Measure and Cut the Wood
The first step in building your wooden coffee table is to measure and cut the wood pieces to the desired dimensions. Here’s how to do it:
- Start by measuring and marking the dimensions for the tabletop. Depending on the size you want, typical coffee table dimensions range from 18-20 inches in height and 36-48 inches in length or width.
- Using a measuring tape, measure and mark the required length and width on the wood. Use a straightedge or carpenter’s square to ensure accurate measurements.
- Once the tabletop dimensions are marked, use a saw to cut the wood accordingly. If you don’t have the necessary tools for cutting straight lines, consider having the wood cut at a local hardware store or lumber yard.
- Repeat the measuring and cutting process for the legs of the table. The leg height will depend on personal preference, but a typical coffee table leg height is around 16 inches.
Remember to take safety precautions while cutting the wood, such as wearing protective eyewear and gloves, and using clamps to secure the wood in place. Always double-check your measurements before making any cuts to avoid any mistakes.
Once you have all the wood pieces cut to the correct dimensions, move on to the next step: sanding the wood.
Step 2: Sand the Wood
After cutting the wood pieces for your coffee table, the next step is to sand them to achieve a smooth and polished finish. Sanding not only enhances the appearance of the wood but also helps to create a more comfortable and splinter-free surface. Here’s how to sand the wood:
- Start by using coarse-grit sandpaper, typically 80 or 100 grit, to remove any rough edges, splinters, or imperfections on the wood surfaces.
- Sand the entire surface of the wood, including the tabletop and legs, using long and even strokes. Be sure to sand with the grain of the wood for the best results.
- As you sand, gradually switch to finer-grit sandpaper, such as 120 or 150 grit, to achieve a smoother finish. This will help remove any remaining roughness or scratches left by the coarse-grit sandpaper.
- Continue sanding until the wood feels smooth and free of any visible imperfections. Take your time and pay attention to detail during this step, as it will greatly impact the final appearance of your coffee table.
- Once you are satisfied with the smoothness of the wood, use a damp cloth or tack cloth to remove any dust or debris left from the sanding process.
Remember to wear a dust mask and protective eyewear while sanding to prevent inhaling dust particles.
Sanding the wood not only improves its tactile quality but also prepares the surface for further treatment, such as painting or staining. In the next step, we will guide you through assembling the tabletop.
Step 3: Assemble the Tabletop
Now that you have sanded the wood pieces, it’s time to assemble the tabletop for your coffee table. Follow these steps to ensure a sturdy and secure tabletop:
- Lay the wooden pieces for the tabletop on a flat and stable surface. Arrange them side by side, ensuring that the edges align properly.
- If desired, apply a thin layer of wood glue along the edges of the wood pieces to reinforce the joints. This will add extra stability to the tabletop.
- Once the glue is applied, carefully press the wood pieces together, ensuring that they are aligned evenly. Use clamps to hold the pieces in place and allow the glue to dry according to the manufacturer’s instructions. Make sure to wipe away any excess glue with a damp cloth.
- If you prefer a more seamless look, you can also use dowels or biscuit joints to join the wooden pieces together. This method requires additional tools and expertise, but it provides a stronger bond and eliminates the need for visible glue lines.
After assembling the tabletop, give the glue sufficient time to dry and set before moving on to the next step. This will typically take a few hours, but it’s best to consult the instructions on the wood glue’s packaging for specific drying times.
Once the tabletop is securely assembled, it’s time to move on to attaching the legs in the next step.
When making a simple wooden coffee table, make sure to sand the wood thoroughly before assembling to ensure a smooth and even surface for staining or painting.
Read more: How To Make Coffee Table Legs
Step 4: Attach the Legs
Now that your tabletop is assembled, it’s time to attach the legs to complete the structure of your wooden coffee table. Follow these steps to ensure secure attachment:
- Flip the tabletop over so that the bottom side is facing up.
- Measure and mark the placement of the legs on each corner of the tabletop. Make sure the legs are evenly spaced and centered.
- Once the placement is marked, pre-drill pilot holes on the tabletop at the marked locations. This will prevent the wood from splitting when you attach the screws.
- Align the legs with the pilot holes and screw them securely into place using a screwdriver or drill. Ensure that the legs are attached at a 90-degree angle to the tabletop for stability.
- Repeat this process for each leg, double-checking the alignment and stability of each attachment.
Make sure to choose screws that are long enough to securely fasten the legs to the tabletop, but not so long that they penetrate the surface of the tabletop. The size and type of screws may vary depending on the thickness of the wood used and the weight-bearing capacity required.
Once the legs are securely attached, test the stability of the coffee table by gently applying pressure. If everything feels secure, move on to the optional steps of painting or staining the table and applying a protective finish.
Step 5: Paint or Stain the Table (Optional)
Now that your wooden coffee table is structurally complete, you have the option to enhance its appearance by painting or staining the table. Painting or staining the wood can add color, character, and protection to your coffee table. Follow these steps to paint or stain your table:
- If you decide to paint the table, start by applying a primer coat. This will create a smooth and even surface for the paint to adhere to. Follow the instructions on the primer’s packaging for application guidelines.
- Once the primer is dry, use a brush or roller to apply your chosen paint color. Apply thin coats and allow each coat to dry completely before adding additional coats. This will ensure an even and professional-looking finish.
- If you prefer the natural beauty of the wood to show through, you can choose to stain the table instead. Start by sanding the wood lightly to create a smooth surface, and then remove any dust or debris with a tack cloth.
- Using a brush or cloth, apply the wood stain evenly on the surface of the table. Allow the stain to penetrate the wood for the recommended amount of time specified on the staining product. Remove any excess stain with a clean cloth.
- Allow the paint or stain to dry thoroughly according to the manufacturer’s instructions. This may take several hours or longer, depending on the product and environmental conditions.
Remember to work in a well-ventilated area when painting or staining and use appropriate safety equipment, such as gloves and a mask, to protect yourself from fumes or particles.
Adding a protective finish is optional but highly recommended to prolong the lifespan of your table and protect it from scratches, moisture, and general wear and tear. Keep reading to learn how to apply a protective finish in the next step.
Step 6: Apply a Protective Finish (Optional)
If you want to give your wooden coffee table added durability and protection, applying a protective finish is a great option. A protective finish can help safeguard the surface of your table against moisture, stains, and daily use. Follow these steps to apply a protective finish:
- Start by ensuring that the table is clean and free of any dust or debris. Use a soft cloth or tack cloth to wipe down the entire surface.
- If you have chosen to paint the table, apply the protective finish after the paint has thoroughly dried. If you have stained the wood, make sure the stain has fully cured before applying the protective finish.
- Select a suitable protective finish for wood, such as polyurethane, varnish, or lacquer. Check the manufacturer’s instructions for the specific application process and drying times.
- Using a clean brush or applicator, apply a thin and even coat of the protective finish to the tabletop and legs. Ensure that you cover the entire surface, including the edges.
- Allow the first coat to dry according to the manufacturer’s instructions. This may require multiple hours or even overnight.
- Lightly sand the dried finish with a fine-grit sandpaper to create a smooth surface. Wipe away any sanding dust with a soft cloth or tack cloth.
- Apply additional coats of the protective finish, following the same process of applying, drying, and sanding between coats. The number of coats will depend on the level of protection and the desired finish.
- Once the final coat is applied, allow the protective finish to cure fully before using the table. This may take several days or as directed by the manufacturer.
The application of a protective finish will not only enhance the longevity of your coffee table but also give it a beautiful sheen. It will provide a barrier against spills, scratches, and general wear, keeping your table looking great for years to come.
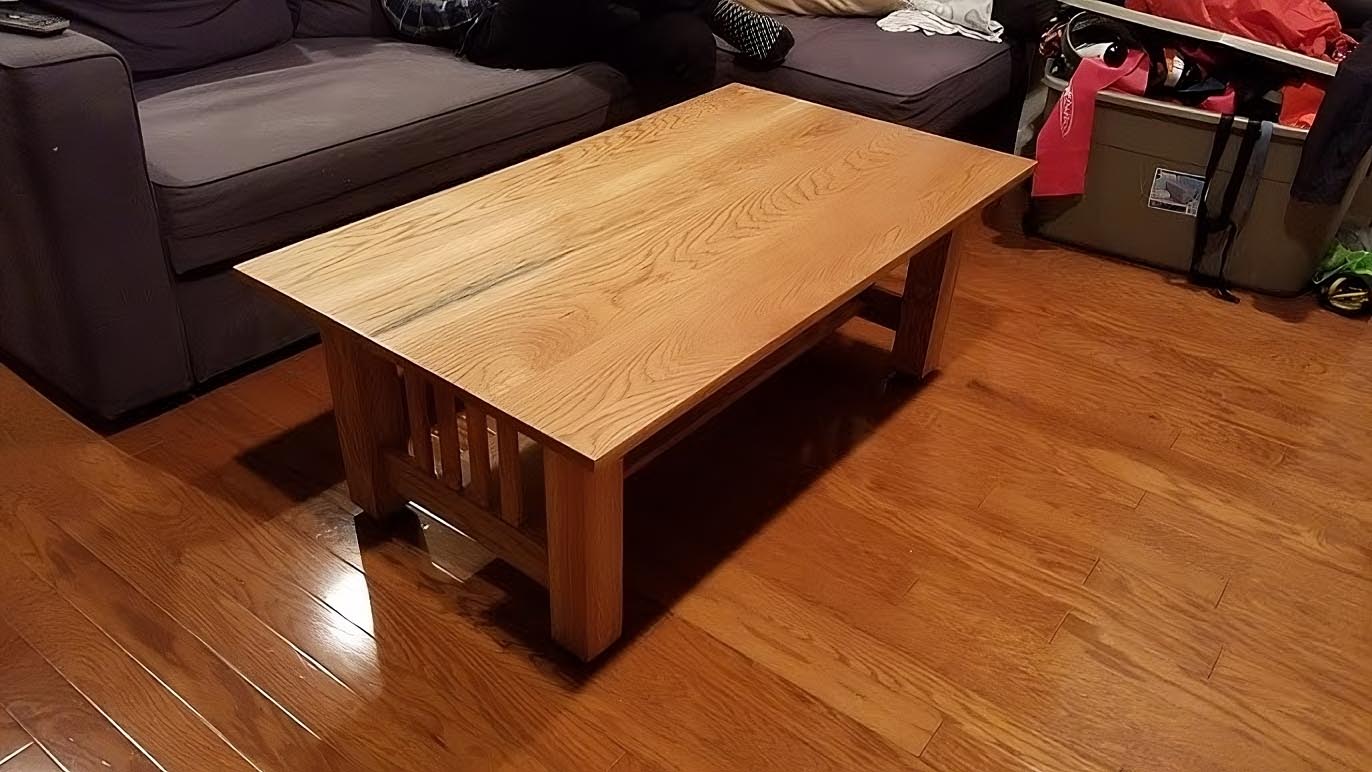
With the completion of the optional protective finish, your DIY wooden coffee table is now ready to be showcased in your living room! Enjoy your newly crafted piece of furniture and take pride in your woodworking skills.
Conclusion
Congratulations on successfully completing your journey to build a simple wooden coffee table! By following the steps outlined in this guide, you have created a personalized piece of furniture that adds charm and functionality to your living room.
Throughout this process, you learned how to measure and cut the wood, sand the surfaces for a smooth finish, assemble the tabletop, attach the legs securely, and optionally paint, stain, and apply a protective finish to your coffee table. These skills can be applied to future woodworking projects as well.
Remember to take your time with each step, ensuring accuracy and attention to detail. Safety should always be a priority, so don’t forget to use protective equipment and follow proper guidelines when using tools or handling materials.
Whether you chose to paint your table in a bold color or stain it to highlight the natural beauty of the wood, your coffee table is now a reflection of your personal style and craftsmanship. It will undoubtedly become a focal point in your living room, attracting compliments and admiration from friends and family.
Enjoy the satisfaction of knowing that you have created a piece of furniture that is not only functional but also holds sentimental value. Every time you gather around your coffee table or use it for various activities, you can take pride in the fact that you made it with your own hands.
Thank you for joining us on this woodworking adventure. We hope this guide has inspired and empowered you to continue exploring the world of DIY furniture and unleashing your creativity. Happy woodworking!
Frequently Asked Questions about How To Make A Simple Wooden Coffee Table
Was this page helpful?
At Storables.com, we guarantee accurate and reliable information. Our content, validated by Expert Board Contributors, is crafted following stringent Editorial Policies. We're committed to providing you with well-researched, expert-backed insights for all your informational needs.


0 thoughts on “How To Make A Simple Wooden Coffee Table”