Furniture
How To Recover A Lampshade
Modified: January 6, 2024
Learn how to recover lamp shades easily with our step-by-step guide. Revitalize your furniture and give it a fresh new look!
(Many of the links in this article redirect to a specific reviewed product. Your purchase of these products through affiliate links helps to generate commission for Storables.com, at no extra cost. Learn more)
Introduction
Welcome to our comprehensive guide on how to recover lamp shades! Whether your lampshade has been damaged, stained, or simply needs a refresh, we’ve got you covered. In this article, we will walk you through a step-by-step process to assess the damage, clean and dust the lampshade, remove stains and spills, restore its shape, repair tears or holes, reattach trim or decorative details, replace the lampshade frame if necessary, and finally, reassemble the lampshade. So, let’s get started and bring new life to your beloved lampshade!
Lampshades can often become worn out, discolored, or damaged over time. They can accumulate dust, get stained by accidental spills, or lose their shape due to prolonged use. Instead of discarding them and buying new ones, recovering lampshades can be a cost-effective and eco-friendly alternative. With a little bit of time and effort, you can transform your old lampshade into a stunning piece that complements your decor.
Before you begin the recovery process, it is important to assess the extent of the damage. This will help you determine whether a simple cleaning will do the trick or if you need to take more extensive measures to restore your lampshade. Once you have assessed the damage, you can move on to the appropriate steps to bring your lampshade back to its former glory.
In the following sections, we will guide you through each step of the recovery process, sharing tips and techniques to help you achieve the best results. Whether you are dealing with a fabric, paper, or even a wicker lampshade, the principles and methods outlined here can be applied to various types of lampshades.
Remember, every lampshade is unique, and you may encounter specific challenges based on the material and construction of your lampshade. Keep an open mind, be patient, and adapt the techniques to suit your situation. With a little bit of creativity and some TLC, you can transform your lampshade and give it a new lease on life.
Let’s dive into the process of recovering lampshades and discover how you can breathe new life into these essential and often overlooked pieces of decor.
Key Takeaways:
- Transform worn-out lampshades into stunning decor pieces with patience, creativity, and simple DIY techniques outlined in this comprehensive guide. Save money, reduce waste, and breathe new life into your space!
- By following the step-by-step recovery process, you can revive and restore your lampshades, adding charm and character to your home. Embrace creativity, attention to detail, and eco-friendly practices for stunning results.
Read more: How To Redo A Lampshade
Assessing the Damage
Before you begin the recovery process, it’s crucial to carefully assess the damage to your lampshade. This will help you determine the best course of action and ensure that you take the necessary steps to restore it effectively.
Start by examining the overall condition of the lampshade. Look for any signs of wear and tear, such as fraying fabric, discolored patches, or loose trim. Take note of any stains, spills, tears, or holes that may require special attention.
If the damage is limited to minor stains and dust, a thorough cleaning might be sufficient to restore your lampshade. However, if there are significant tears, holes, or structural damage, you may need additional supplies and techniques to repair and recover your lampshade.
If you’re unsure about the best approach to tackle the damage, consider consulting a professional lampshade restorer or interior designer. They can provide expert advice and recommend the most suitable methods for your specific situation.
Additionally, consider the material and construction of your lampshade. Different types of lampshades require varying techniques and materials for recovery. Fabric lampshades, for example, can be cleaned using different methods than paper or wicker lampshades.
Take note of the shape and size of your lampshade as well. Some lampshades may have delicate or intricate details that require extra care during the recovery process. Others may have a specialized frame that needs to be considered when choosing the right fabric or materials for reupholstering.
Once you have assessed the damage and considered the specific characteristics of your lampshade, you can move on to the appropriate steps for cleaning, repairing, and recovering your lampshade. In the following sections, we will provide detailed instructions and tips to guide you through each stage of the recovery process.
Remember, patience and attention to detail are key when assessing the damage to your lampshade. By taking the time to properly evaluate the condition and needs of your lampshade, you’ll be better equipped to restore it effectively and ensure that it shines once again.
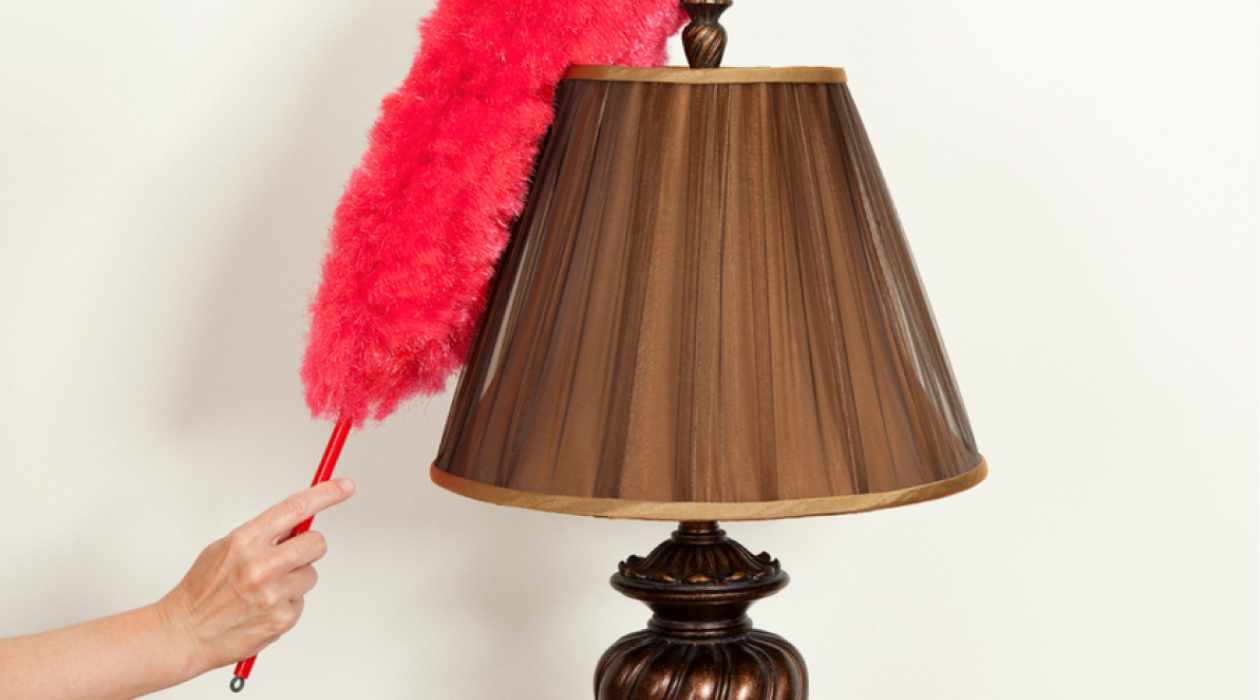
Cleaning and Dusting
Regular cleaning and dusting are essential to maintain the beauty and longevity of your lampshade. Over time, dirt, dust, and other particles can accumulate on the surface, affecting its appearance and potentially causing damage. By incorporating a simple cleaning routine, you can keep your lampshade looking fresh and vibrant.
Here’s a step-by-step guide on how to clean your lampshade:
- Assess the Material: Different materials require different cleaning methods. Determine the fabric or material of your lampshade before proceeding. Depending on the type, you may need to use specialized cleaning products or techniques.
- Dust the Lampshade: Start by removing loose dust from the lampshade. Gently use a soft brush or a clean, dry cloth to wipe away any visible dirt or dust particles. If your lampshade is fragile or made of delicate material, you can use a vacuum cleaner with a brush attachment to gently remove dust.
- Create a Cleaning Solution: Mix a small amount of mild dish soap or laundry detergent with warm water. Avoid using abrasive cleaners or strong chemicals as they can damage the fabric or material of the lampshade.
- Test the Solution: Before applying the cleaning solution to the entire lampshade, test it on a small, inconspicuous area to ensure that it doesn’t cause any discoloration or damage. Wait for the test spot to dry before proceeding.
- Clean the Lampshade: Dip a soft cloth or sponge into the cleaning solution, making sure it is damp but not soaking wet. Gently wipe the lampshade’s surface, working in a circular motion from top to bottom. Pay extra attention to areas with stains or spills, applying a bit more pressure if needed.
- Rinse and Dry: After cleaning the lampshade, dampen a clean cloth with plain water to rinse any remaining soap residue. Gently wipe the lampshade again to remove the soap. Finally, use a dry cloth to blot and absorb any excess moisture. Allow the lampshade to air dry in a well-ventilated area.
It’s important to note that not all lampshades can be washed using water or liquids. Paper or delicate fabric lampshades may be best cleaned with alternative methods. For these types of lampshades, consider using a soft brush or vacuum cleaner to remove dust and dirt. If necessary, you can also use a dry cleaning sponge specifically designed for lampshades.
By following these cleaning steps regularly, you can maintain the cleanliness and appearance of your lampshade, prolonging its lifespan and ensuring it continues to enhance your space.
Removing Stains and Spills
Accidents happen, and lampshades can often fall victim to spills and stains. Whether it’s a coffee mishap or a bit of food that found its way onto your lampshade, it’s important to address stains and spills promptly to prevent them from setting in and becoming more difficult to remove. Here’s how you can effectively remove stains and spills from your lampshade:
- Identify the Stain: Different stains require different treatment methods. Identify the nature of the stain before proceeding. Common types of stains include oil-based stains, water-based stains, ink stains, or food and beverage stains.
- Blot the Stain: For fresh stains, start by gently blotting the affected area with a clean, dry cloth or paper towel. Be careful not to rub the stain, as this can cause it to spread or set deeper into the fabric.
- Treat the Stain: Depending on the type of stain, there are various methods you can try:
- Oil-based Stains: For grease or oil-based stains, such as from cooking oils or lotions, sprinkle a small amount of cornstarch or talcum powder on the stain. Let it sit for a few minutes to absorb the oil, then carefully brush or vacuum away the powder.
- Water-based Stains: For water-based stains, such as coffee, tea, or water spills, mix a small amount of mild dish soap with warm water. Dampen a clean cloth with the soapy solution and gently blot the stain. Continue blotting until the stain is lifted.
- Ink Stains: Ink stains can be particularly challenging to remove. If the stain is fresh, try dabbing it with a cotton ball soaked in rubbing alcohol or nail polish remover. Be cautious and test the solution on a small, inconspicuous area first to ensure it doesn’t damage the fabric.
- Food and Beverage Stains: For food or beverage stains, gently blot the stain with a clean cloth or sponge dipped in a mixture of mild dish soap and warm water. If the stain persists, you can try a fabric stain remover specifically designed for the type of stain you’re dealing with.
- Rinse and Dry: After treating the stain, rinse the area with plain water to remove any residual soap or cleaning solution. Blot the area with a clean, damp cloth to remove excess moisture, and then allow the lampshade to air dry completely.
It’s important to note that some lampshade materials may be more delicate and sensitive to certain cleaning solutions. Always test any cleaning method or solution on an inconspicuous area first to ensure it doesn’t cause discoloration or damage to the fabric.
If you’re dealing with an old or stubborn stain that refuses to budge, it may be a good idea to consult a professional lampshade restorer or seek expert advice to avoid causing further damage to the lampshade.
Remember, prompt action and gentle treatment are key when removing stains and spills from your lampshade. By addressing these issues promptly, you can keep your lampshade looking fresh and vibrant for years to come.
Restoring Shape
Over time, lampshades can lose their shape due to regular use or improper handling. A misshapen lampshade not only affects its visual appeal but also diminishes the quality of light it emits. Thankfully, restoring the shape of a lampshade is a relatively simple process that can make a significant difference. Here’s how you can restore the shape of your lampshade:
- Identify the Shape Issue: Start by identifying the specific shape issue with your lampshade. It may be sagging, collapsing inward, or bulging outward. Understanding the nature of the problem will help determine the most effective approach for restoring its shape.
- Remove the Lampshade: Carefully remove the lampshade from the lamp or light fixture to have better access to its structure and facilitate the restoration process.
- Address Sagging or Collapse: If your lampshade is sagging or collapsing inward, use a hairdryer or a heat gun on its lowest setting to apply gentle heat to the affected area. Move the hairdryer or heat gun around the lampshade, maintaining a distance of at least 6 inches to avoid overheating or damaging the fabric. As the heat warms up the material, use your hands to reshape and mold the lampshade back into its desired shape. Continue applying heat and manipulating the fabric until you achieve the desired shape. Be patient and work slowly, ensuring not to overstretch or distort the material.
- Address Bulging or Outer Shape Issues: If your lampshade is bulging outward or has other shape issues, a simple solution is to use binder clips or clothespins. Start by identifying the areas that need reshaping and gently pinch them with the clips or clothespins. Use multiple clips or clothespins if necessary to distribute the pressure evenly and encourage the lampshade to regain its original shape. Leave the clips or clothespins in place for several hours or overnight, allowing the fabric to gradually conform to the desired shape.
- Remove the Clips or Clothespins: After the lampshade has had sufficient time to reshape, remove the binder clips or clothespins carefully. Check the lampshade to ensure it has regained its desired shape. If further adjustments are needed, repeat the steps mentioned earlier until you achieve the desired result.
- Reattach the Lampshade: Once you are satisfied with the shape restoration, carefully reattach the lampshade to the lamp or light fixture. Ensure it is securely in place before turning on the light.
It’s important to note that not all lampshade materials can withstand heat. Be cautious and use the heat method only on lampshades made of heat-resistant materials, such as metal or some types of fabric. For delicate or non-heat-resistant lampshades, focus on using clips or clothespins to reshape the lampshade slowly.
If your lampshade has a more complex structure or if the shape issue persists despite your efforts, it may be beneficial to consult a professional lampshade restorer. They will have the expertise and equipment to address more challenging shape issues.
By following these steps and taking the time to restore the shape of your lampshade, you can ensure that it regains its original form and enhances the aesthetics of your space.
To recover a lamp shade, start by measuring the old shade and selecting a new fabric. Carefully remove the old fabric, then use it as a template to cut the new fabric. Attach the new fabric to the shade using fabric glue or double-sided tape for a quick and easy update.
Read more: How To Recover Countertops
Repairing Tears or Holes
Accidents happen, and lampshades can sometimes develop small tears or holes. These imperfections can be unsightly and compromise the overall appearance of your lampshade. The good news is that with a little bit of patience and some basic materials, you can repair tears or holes in your lampshade and restore its beauty. Here’s how you can repair tears or holes in your lampshade:
- Assess the Damage: Start by assessing the size and location of the tear or hole. Determine if it is small enough to be repaired using DIY methods or if it requires professional assistance.
- Gather the Materials: To repair the tear or hole, you will need some basic materials, including fabric glue or adhesive, a small paintbrush, fabric swatches or patches, scissors, and a tape measure or ruler.
- Clean the Surface: Before applying any adhesive, ensure that the area around the tear or hole is clean and free from dust or debris. Gently wipe the area with a cloth or paper towel to remove any particles that may interfere with the adhesive’s effectiveness.
- Apply the Adhesive: Using a small paintbrush or the applicator provided with the fabric adhesive, carefully apply a thin layer of adhesive to the edges of the tear or hole. Be sure to spread the adhesive evenly and avoid applying too much, as it may seep through the fabric.
- Position the Fabric Patch: Cut a fabric swatch or patch that is slightly larger than the tear or hole. Place the patch over the adhesive, ensuring that it completely covers the damaged area. Gently press down on the patch to secure it in place.
- Smooth out the Patch: Use your fingers or a clean cloth to smooth out any wrinkles or creases in the fabric patch. Ensure that it is properly adhered to the lampshade and the edges are flush with the surrounding fabric.
- Let it Dry: Allow the adhesive to dry completely, following the manufacturer’s instructions. This will usually take a few hours, but be sure to check the specific drying time mentioned on the adhesive product.
- Trim Excess Fabric: Once the adhesive is fully dry, use scissors to carefully trim any excess fabric from the patch, ensuring a neat and seamless repair.
- Inspect the Repair: Take a close look at the repaired area to verify that the tear or hole is no longer visible, and the fabric patch blends well with the surrounding material. Make any necessary adjustments if needed.
Keep in mind that the extent of the damage and the type of material will determine the success of the repair. If the tear or hole is too large or located in a critical area, it may be best to seek professional help or consider replacing the lampshade altogether.
By following these steps and taking the time to repair tears or holes in your lampshade, you can extend its lifespan and maintain its visual appeal. The repaired lampshade will not only continue to serve its functional purpose but also add a touch of charm to your space.
Reattaching Trim or Decorative Details
Trim and decorative details play a crucial role in the overall aesthetic appeal of a lampshade. Over time, these embellishments can become loose or detached, detracting from the lampshade’s beauty. However, reattaching trim or decorative details is a relatively simple task that can be done with a few basic supplies and some attention to detail. Here’s how you can reattach trim or decorative details to your lampshade:
- Gather the Supplies: To reattach trim or decorative details, you will need fabric glue or adhesive, a small paintbrush, and the trim or decorative elements themselves. Ensure that the glue or adhesive you choose is suitable for the materials involved.
- Assess the Placement: Before applying any adhesive, determine the desired placement of the trim or decorative detail on the lampshade. Take into consideration the design and structure of the lampshade to ensure a visually appealing and secure attachment.
- Apply the Adhesive: Using a small paintbrush or the applicator provided with the fabric glue or adhesive, carefully apply a thin layer of adhesive to both the back of the trim or decorative detail and the area of the lampshade where it will be attached. Ensure that the adhesive is evenly spread and covers the entire surface.
- Position the Trim or Decorative Detail: Carefully place the trim or decorative detail onto the lampshade in the desired position, pressing it down gently to ensure a secure bond with the adhesive. Use your fingers or a clean cloth to smooth out any wrinkles or bubbles that may appear.
- Hold or Secure the Trim: Depending on the type of adhesive used and the weight of the trim or decorative detail, you may need to hold it in place for a few minutes to allow the adhesive to set. For heavier pieces or those requiring extra support, consider using small clamps, binder clips, or clothespins to hold the trim in place until the adhesive fully dries. Be cautious not to damage or dent the lampshade when applying pressure.
- Allow the Adhesive to Dry: Follow the manufacturer’s instructions on the adhesive product for the recommended drying time. Typically, it will take at least a few hours for the adhesive to dry completely, but be sure to check the specific guidelines mentioned by the manufacturer.
- Inspect the Attachment: Once the adhesive is fully dry, carefully inspect the attachment to ensure that the trim or decorative detail is securely in place and aligned correctly. Make any necessary adjustments or reapply adhesive if needed.
It’s important to note that different types of trim or decorative details may require specific adhesives or techniques for optimal attachment. Take into consideration the material and construction of the trim or decorative element, as well as the fabric or material of the lampshade, when selecting the appropriate adhesive.
By following these steps and taking the time to reattach trim or decorative details, you can restore the visual appeal of your lampshade and enhance its overall aesthetic. The reattached trim or decorative elements will add a touch of elegance and sophistication to your lampshade, making it a standout piece in your decor.
Replacing the Lampshade Frame
In some cases, the damage to a lampshade may be beyond repair, or you may simply want to give it a completely new look. Replacing the lampshade frame allows you to create a fresh and customized lampshade that suits your style and preferences. While it may seem daunting, replacing the lampshade frame can be a rewarding DIY project. Here’s how you can go about it:
- Measure the Existing Lampshade: Begin by measuring the dimensions of the existing lampshade, including the height, top diameter, and bottom diameter. This will serve as a guide when selecting a new lampshade frame.
- Select a New Lampshade Frame: Browse through lampshade frame options and choose one that fits your desired style and specifications. Make sure the new frame is appropriate for the size and shape of your lampshade.
- Remove the Old Lampshade: Carefully detach the old lampshade from the lamp or light fixture. This may involve unscrewing the top finial, removing any clips or fasteners, or simply pulling the old shade off the frame.
- Prepare the New Lampshade Frame: If the new lampshade frame comes disassembled, follow the manufacturer’s instructions to assemble it. This usually involves connecting the frame components through clamps, screws, or clips.
- Attach the Fabric: Lay the new lampshade frame on a clean surface, and measure and cut the fabric of your choice to fit around the frame. Leave a small margin of fabric on all sides for attaching it to the frame. Ensure the fabric is appropriate for lampshade use and complements your decor.
- Apply the Adhesive: Use fabric glue or adhesive to secure the fabric to the frame. Apply a thin layer of adhesive along the top and bottom rings of the frame, and press the fabric onto the adhesive, starting from one end and working your way around. Smooth out any wrinkles or creases as you go.
- Secure the Fabric: Use clothespins or binder clips to hold the fabric in place on the frame until the adhesive dries. This will help ensure a secure and even attachment. Give the adhesive enough time to dry completely, as per the manufacturer’s instructions.
- Trim Excess Fabric: Once the adhesive is dry, trim any excess fabric from the top and bottom of the lampshade, ensuring a neat and clean finish.
- Reattach the Lampshade: Finally, reattach the new lampshade to the lamp or light fixture. Depending on the type of lamp or fixture, this may involve screwing on a top finial or attaching the lampshade using clips or other fasteners.
Remember to exercise caution and follow all safety guidelines when working with electrical components. If you are not comfortable or experienced in handling electrical connections, it is advisable to seek professional help for reattaching the lampshade to the lamp or light fixture.
Replacing the lampshade frame allows you to unleash your creativity and give your lamp a fresh new look. By following these steps and utilizing your own unique sense of style, you can create a customized lampshade that perfectly complements your decor.
Reassembling the Lampshade
Once you have completed the necessary repairs, cleaning, and any replacements, it’s time to reassemble your lampshade. This final step brings everything together and allows you to admire the results of your hard work. Here’s how you can reassemble your lampshade:
- Gather All the Components: Make sure you have all the parts needed for reassembling your lampshade, including the lampshade frame, newly recovered or replaced fabric, adhesive if necessary, and any trim or decorative elements.
- Attach the Recovered or Replaced Fabric: If you have recovered your lampshade or replaced the fabric, position it over the lampshade frame carefully. Ensure that the fabric is straight and aligned properly with the top and bottom rings of the frame.
- Secure the Fabric: Depending on the type of adhesive used, follow the manufacturer’s instructions to apply it to the frame or fabric. Press the fabric firmly against the frame to ensure a secure attachment. If needed, use clothespins or binder clips to hold the fabric in place until the adhesive dries.
- Reattach Trim or Decorative Elements: If you have removed trim or decorative elements during the recovery process, now is the time to reattach them. Apply adhesive to the back of the trim or decorative element and carefully position it on the fabric or frame. Hold it in place until the adhesive sets or use clips to secure it while it dries.
- Inspect the Lampshade: Once all the components are in place, step back and inspect your reassembled lampshade. Check for any loose or unevenly attached elements and make the necessary adjustments.
- Reattach the Lampshade to the Lamp or Light Fixture: Carefully reattach the lampshade to the lamp or light fixture. Follow the manufacturer’s instructions provided with the lamp or light fixture to ensure a secure attachment. This may involve screwing on a top finial, attaching the lampshade using clips or other fasteners, or simply placing it on the fixture.
- Test the Lampshade: Finally, test the functionality of your lampshade by turning on the light. Ensure that the lampshade is properly secured and that the light is emitting as desired. Make any necessary adjustments if needed.
Reassembling your lampshade is the exciting final step in the recovery process. Take your time to ensure that every aspect is in place and securely attached. This will ensure a stunning and functional lampshade that adds to the ambiance of your space.
Once you have completed reassembling your lampshade, take a moment to step back and admire your work. You have successfully revived and restored your lampshade, giving it a new lease on life. Whether you have recovered, repaired, or replaced components, your efforts have paid off, and you can now enjoy the beauty and functionality of your renewed lampshade.
Read more: How To Recover Boat Cushions
Conclusion
Congratulations on successfully recovering and rejuvenating your lampshade! By following the step-by-step process outlined in this comprehensive guide, you have transformed your worn-out or damaged lampshade into a stunning centerpiece that adds charm and character to your space.
We began by assessing the damage, identifying the issues, and understanding the materials and construction of the lampshade. From there, we delved into various techniques for cleaning and dusting, removing stains and spills, restoring the shape, repairing tears or holes, reattaching trim or decorative details, replacing the lampshade frame, and finally, reassembling the lampshade.
Throughout this process, you demonstrated patience, attention to detail, and creativity. You paid careful consideration to the type of lampshade you were working with, selecting appropriate cleaning methods, adhesives, and materials for repair or replacement. By doing so, you ensured the long-lasting beauty and functionality of your lampshade.
Remember, each lampshade is unique, and you may encounter specific challenges based on the materials and design. However, armed with the knowledge and techniques in this guide, you have the skills to handle various lampshade recovery projects successfully.
Recovering lampshades not only saves you money but also allows you to be eco-friendly by reducing waste. Rather than throwing away a perfectly good lampshade, you have given it a new lease on life, enhancing the ambiance and style of your home.
We hope that this comprehensive guide has empowered you to take on future lampshade recovery projects with confidence and creativity. Whether it’s for a vintage lamp, a treasured family heirloom, or a modern piece, you now have the knowledge and skills to recover, repair, or replace lampshades to suit your personal style and decor.
Remember to take your time, enjoy the process, and let your imagination soar as you create unique lampshades that reflect your personality. With a little effort and creativity, your recovered lampshades will continue to bring warmth and beauty to your space for years to come.
Frequently Asked Questions about How To Recover A Lampshade
Was this page helpful?
At Storables.com, we guarantee accurate and reliable information. Our content, validated by Expert Board Contributors, is crafted following stringent Editorial Policies. We're committed to providing you with well-researched, expert-backed insights for all your informational needs.