Home>Interior Design>How To Prepare For Spring Cleaning: 6 Steps Experts Take
Interior Design
How To Prepare For Spring Cleaning: 6 Steps Experts Take
Modified: February 22, 2024
Get your home ready for spring with these expert interior design tips. Learn the 6 essential steps to prepare for a successful spring cleaning.
(Many of the links in this article redirect to a specific reviewed product. Your purchase of these products through affiliate links helps to generate commission for Storables.com, at no extra cost. Learn more)
How to Prepare for Spring Cleaning: 6 Steps Experts Take
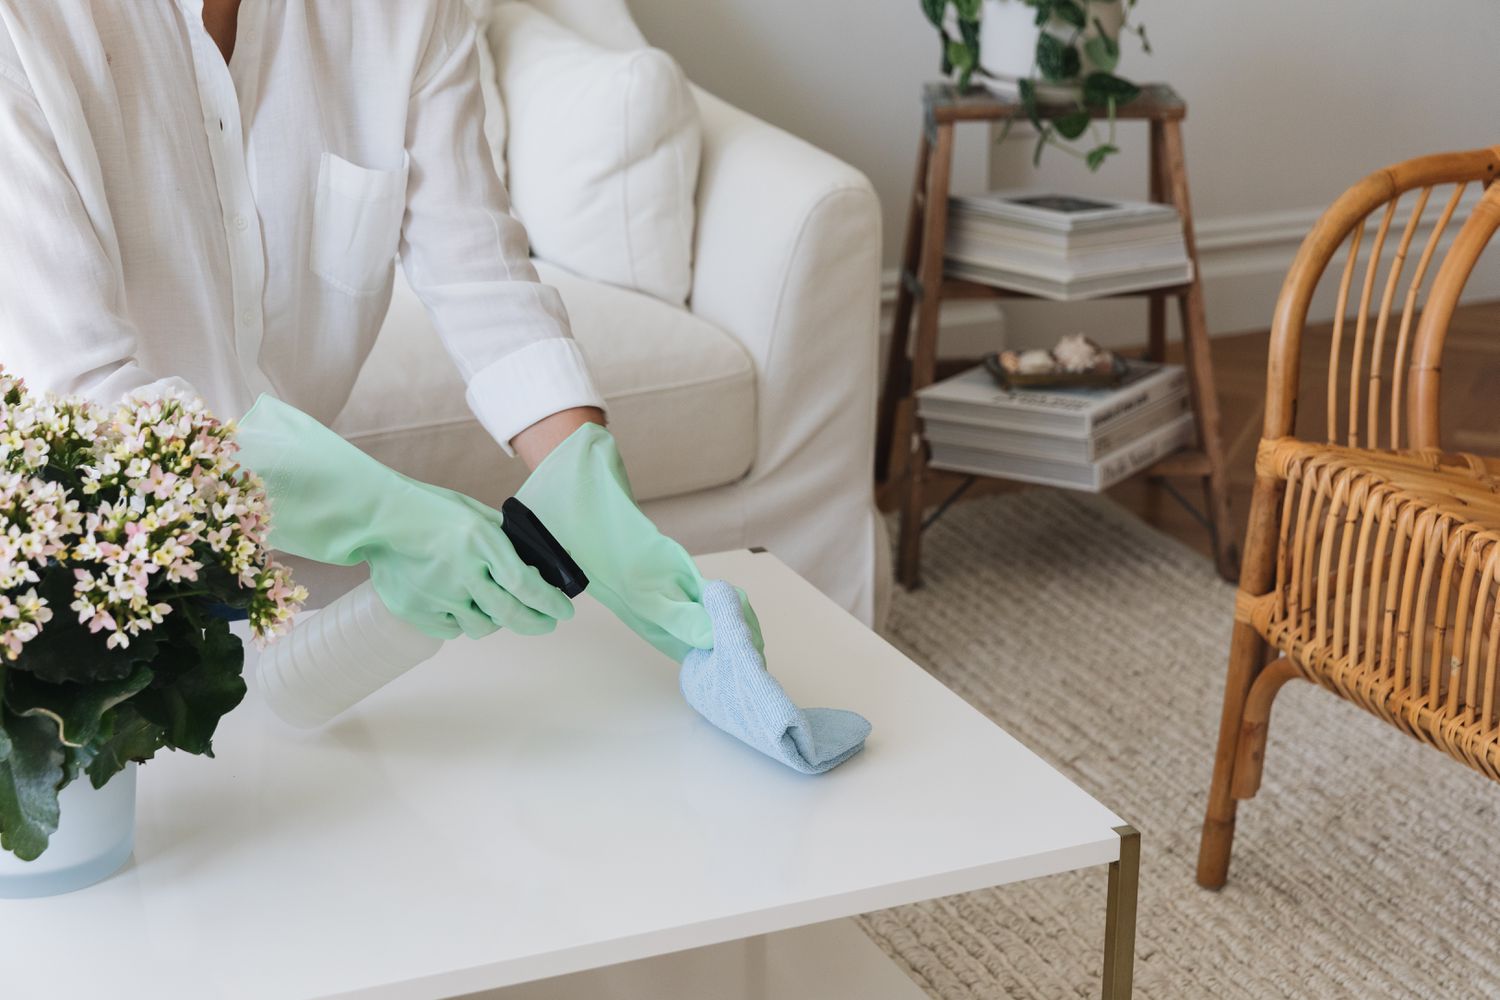
Spring is a time of renewal and rejuvenation, and what better way to embrace the season than by giving your home a thorough cleaning? However, spring cleaning can feel overwhelming if you don’t have a plan in place. That’s where the experts come in. By following their tried-and-true steps, you can make your spring cleaning process more efficient and effective. Here are six steps that experts take to prepare for spring cleaning.
Key Takeaways:
- Expert Tip: Prioritize high-traffic areas and neglected spaces for efficient spring cleaning. Assess, plan, and allocate time to ensure every corner of your home receives the attention it deserves.
- Maintain a clean and inviting home year-round by establishing daily and weekly cleaning routines. Get everyone involved and seek professional help when needed to keep your space tidy and organized.
Assess and Prioritize Areas for Cleaning
The first step in preparing for spring cleaning is to assess your home and determine which areas need the most attention. Take a walk-through of each room and make note of the problem areas, such as dusty corners, stained carpets, or cluttered countertops. By identifying these areas, you can prioritize your cleaning tasks and allocate the necessary time and resources.
Create a Realistic Cleaning Schedule
A cleaning schedule is essential to keep you on track and prevent overwhelming yourself. Start by breaking down your cleaning tasks into manageable chunks. Assign specific days or weekends for each room or zone. Be realistic about your time and energy levels. Remember, spring cleaning doesn’t have to be completed in a single day. Spread out the tasks over a few weeks if needed.
Gather Necessary Cleaning Supplies and Tools
Before you begin your spring cleaning journey, ensure that you have all the necessary cleaning supplies and tools at hand. Stock up on cleaning solutions, microfiber cloths, sponges, gloves, and any other materials that you may require. Having everything ready before you start will save you time and prevent unnecessary interruptions during the cleaning process.
Declutter and Organize
Spring cleaning is not just about cleaning the dirt and grime; it’s also the perfect opportunity to declutter and organize your space. Go through your belongings and separate items into three categories: keep, donate/sell, and discard. Get rid of items that you no longer need or use to create a more organized and clutter-free environment.
Deep Clean Each Area of Your Home
Once you’ve decluttered and organized, it’s time to deep clean each area of your home. Start from the top and work your way down. Dust and wipe down surfaces, clean windows and mirrors, vacuum or mop floors, and tackle any specific cleaning tasks, such as scrubbing the bathroom or kitchen. Pay attention to often neglected areas, like baseboards, light fixtures, and behind furniture.
Maintain Cleanliness Throughout the Year
After you’ve completed your spring cleaning tasks, it’s important to maintain cleanliness throughout the year. Establishing daily and weekly cleaning routines will help you keep your home in a neat and tidy condition. Stay on top of regular tasks like vacuuming, dusting, and wiping down surfaces to minimize the need for extensive cleaning in the next spring.
By following these six steps that experts take, you can make your spring cleaning process more manageable and effective. Embrace the new season by giving your home the attention and care it deserves, and enjoy the fresh and inviting atmosphere that comes with a thoroughly cleaned space.
Key Takeaways:
- Expert Tip: Prioritize high-traffic areas and neglected spaces for efficient spring cleaning. Assess, plan, and allocate time to ensure every corner of your home receives the attention it deserves.
- Maintain a clean and inviting home year-round by establishing daily and weekly cleaning routines. Get everyone involved and seek professional help when needed to keep your space tidy and organized.
Assess and Prioritize Areas for Cleaning
When it comes to preparing for spring cleaning, the first step is to assess your home and prioritize the areas that need the most attention. This assessment will help you create a plan of action and allocate your time and resources effectively. Here are some expert tips to help you assess and prioritize the areas for cleaning:
1. Take a Walk-through
Start by taking a walk-through of your entire home. Observe each room carefully and make note of any problem areas that require attention. Look out for dusty corners, stained carpets, greasy kitchen surfaces, and cluttered spaces. Assess the condition of your windows, walls, and floors as well. By thoroughly examining each room, you can identify areas that need a deeper clean.
2. Consider High-Traffic Areas
Pay special attention to high-traffic areas, such as entryways, hallways, and living rooms. These areas accumulate more dirt and grime than others due to frequent use. Look out for scuff marks on the walls, dirt build-up on floors, and dust accumulation on furniture. Cleaning these areas thoroughly will not only make your home look better but also create a healthier environment.
3. Evaluate Neglected Spaces
It’s easy to overlook certain spaces that are often neglected during regular cleaning routines. Think about areas like the attic, basement, garage, and storage rooms. These spaces tend to gather dust, cobwebs, and clutter over time. Assessing these areas and including them in your spring cleaning plan will help you create a clean and organized home from top to bottom.
4. Check Up on Appliances and Fixtures
Don’t forget to evaluate your appliances and fixtures. Look for signs of dirt and grime on your kitchen appliances, such as the oven, microwave, and refrigerator. Check the filters in your HVAC system and evaluate the condition of your light fixtures. These often overlooked areas can accumulate dust and affect the overall cleanliness of your home.
5. Consider Specialized Cleaning Needs
Lastly, consider any specialized cleaning needs your home may have. This could include deep cleaning carpets and upholstery, polishing wood furniture, or removing stains from tiles or grout. These tasks may require specific cleaning products or equipment, so be sure to include them in your assessment and prioritize them accordingly.
Once you have assessed your home and identified the areas that require attention, prioritize them based on urgency and importance. Determine which tasks can be completed in a single cleaning session and which may require multiple sessions. Creating a plan of action and tackling one area at a time will make the process more manageable and ensure that every space in your home receives the proper care it deserves during your spring cleaning.
Create a Realistic Cleaning Schedule
When it comes to preparing for spring cleaning, creating a realistic cleaning schedule is essential. Breaking down your cleaning tasks into manageable chunks and assigning specific days or weekends for each room or zone will help you stay organized and on track. Here are some expert tips to help you create a cleaning schedule that works for you:
1. Assess the Time Needed
Start by considering the time needed for each cleaning task. Take into account the size of the area, the level of dirt or clutter, and any specific cleaning requirements. For larger or more challenging areas, such as the garage or attic, you may need to allocate more time. Be realistic about your schedule and the time you have available to dedicate to cleaning.
2. Break it Down
Break down your cleaning tasks into smaller, more manageable chunks. Rather than trying to tackle your entire home in one day, divide it into sections or rooms. For example, you could dedicate one weekend to cleaning the living areas, another weekend to the bedrooms, and so on. Breaking it down will make the process less overwhelming and allow you to focus on one area at a time.
3. Prioritize the Areas
Prioritize the areas that require immediate attention. Consider the assessment you made earlier and identify the areas that need the most work. Allocate more time to these priority areas and schedule them earlier in your cleaning schedule. By addressing the most important areas first, you’ll feel a sense of accomplishment and motivation to continue with the remaining tasks.
4. Consider Your Energy Levels
Take into account your energy levels and schedule cleaning tasks accordingly. If you know that you usually have more energy in the morning, plan to tackle more demanding tasks during that time. Don’t overload yourself with too many tasks on a single day. Be aware of your limitations and plan accordingly to avoid burnout.
5. Be Flexible
Flexibility is key when creating a cleaning schedule. Life happens, and unexpected events may arise that disrupt your plans. Leave some buffer time in your schedule to accommodate any unforeseen circumstances. If you need to adjust or reschedule certain cleaning tasks, don’t stress about it. The goal is to achieve a clean and organized home, and sometimes that requires adapting your plans.
6. Spread it Out
Spring cleaning doesn’t have to be completed in a single day or even a single weekend. If your schedule is tight, spread out the cleaning tasks over several weeks. Dedicate a few hours each week to working on different areas of your home. This approach allows you to maintain consistency and ensures that each task receives the attention it deserves.
Remember, the purpose of a realistic cleaning schedule is to help you stay organized, motivated, and efficient. By breaking down tasks, prioritizing areas, considering your energy levels, and being flexible with your plans, you’ll be well on your way to successfully completing your spring cleaning goals.
Gather Necessary Cleaning Supplies and Tools
Before you embark on your spring cleaning journey, it’s important to ensure that you have all the necessary cleaning supplies and tools at hand. Being well-prepared will save you time and prevent unnecessary interruptions during the cleaning process. Here is a list of essential cleaning supplies and tools that experts recommend gathering:
Read more: How To Take Care Of Grass In Spring
1. Cleaning Solutions
Invest in a variety of cleaning solutions to tackle different surfaces and areas in your home. Consider an all-purpose cleaner for general cleaning, a glass cleaner for windows and mirrors, a disinfectant for bathrooms and high-touch surfaces, and specific solutions for stubborn stains or grease. Having the right cleaning solutions will ensure effective and efficient cleaning.
2. Microfiber Cloths and Sponges
Microfiber cloths and sponges are versatile tools for cleaning various surfaces. They are highly absorbent and effective at trapping dirt and dust. Use them for wiping down countertops, dusting furniture, and cleaning appliances. Consider having different colors or designated cloths for different areas of your home to prevent cross-contamination.
3. Gloves
Protect your hands by wearing gloves while cleaning. They not only shield your skin from harsh chemicals but also provide a better grip when handling wet or dirty surfaces. Choose gloves that fit well and are comfortable to wear for extended periods.
4. Vacuum Cleaner with Attachments
A good-quality vacuum cleaner is crucial for thorough cleaning. Make sure it has attachments like a crevice tool, dusting brush, and upholstery tool. These attachments allow you to clean hard-to-reach areas, corners, and furniture efficiently. Regularly clean or replace the filters to maintain optimal performance.
5. Mop and Bucket
A mop and bucket are essential for cleaning hard floors. Choose a mop that is suitable for your floor type, whether it’s tile, hardwood, or laminate. Consider a mop with a removable and washable head for convenience. Fill the bucket with warm water and a suitable floor cleaner for effective mopping.
6. Cleaning Brushes and Scrubbers
Having a variety of cleaning brushes and scrubbers will make tackling tough stains and grime easier. Use a scrub brush with stiff bristles for scrubbing tile grout or heavily soiled surfaces. A soft-bristle brush is ideal for cleaning delicate surfaces or dusting hard-to-reach areas.
7. Step Ladder
If you have high shelves, ceiling fans, or light fixtures, a stable step ladder will come in handy. Ensure that the ladder is sturdy and secure before using it. Always follow proper safety precautions when working at height.
8. Trash Bags and Recycling Bins
As you declutter and clean, you will generate a significant amount of waste. Make sure to have an ample supply of trash bags and recycling bins nearby. Use separate bags for different types of waste to simplify the disposal process.
9. Protective Gear
Consider any additional protective gear you may need, depending on the tasks involved. This could include safety goggles, a dust mask, or knee pads for added comfort and protection.
By gathering all the necessary cleaning supplies and tools in advance, you’ll be well-equipped to tackle any cleaning task that comes your way. Having everything on hand will save you time and ensure that your spring cleaning process is smooth and efficient.
Declutter and Organize
One of the essential steps in preparing for spring cleaning is decluttering and organizing your home. Clutter not only makes it difficult to clean but also creates a sense of disarray and overwhelm. By decluttering and organizing, you can create a more functional and visually pleasing space. Here are some expert tips to help you declutter and organize effectively:
1. Start with a Plan
Before diving into the decluttering process, create a plan. Determine which areas or rooms you want to tackle first and set achievable goals. Breaking your home into smaller sections will make the task more manageable and prevent feeling overwhelmed.
2. Sort Items into Categories
As you go through your belongings, sort them into categories. Create piles for items you want to keep, donate/sell, and discard. Be ruthless and honest with yourself during this process. Consider if you use the item regularly, if it holds sentimental value, or if it serves a necessary purpose in your life. This will help you make decisions about what to keep or let go.
3. Clear Out Cluttered Spaces
Focus on decluttering spaces that tend to accumulate the most clutter. This could be your closet, pantry, or kitchen countertops. Remove everything from these spaces and evaluate each item. Only put back the things you truly need or love. Consider donating or selling items that are in good condition but no longer serve a purpose in your life.
4. Create Storage Solutions
As you declutter, think about organizing your belongings in a way that makes them easily accessible. Utilize storage bins, baskets, or shelves to keep items neatly organized. Label containers to make it easier to find things when needed. Make use of vertical space by installing hooks or racks to hang items like bags, coats, or cleaning tools.
5. Minimize Paper Clutter
Paper clutter can quickly accumulate and make your space feel messy. Designate a specific spot for incoming mail and paperwork, such as a file organizer or tray. Establish a routine for sorting and addressing the papers regularly. Digitize important documents whenever possible to reduce physical clutter.
6. Create a Maintenance Plan
Once you have decluttered and organized your space, create a maintenance plan to prevent clutter from building up again. Set aside time each day or week to tidy up and put things back in their designated places. Encourage household members to follow the plan and take responsibility for their own belongings.
7. Stay Focused and Take Breaks
Decluttering and organizing can be emotionally and physically tiring. Stay focused on one area at a time and take breaks when needed. Avoid getting sidetracked by sentimental items or getting overwhelmed by the process. Remind yourself of the end goal – a clean and organized home that brings you joy and peace.
Decluttering and organizing your home before starting your spring cleaning will not only make the cleaning process more efficient but also create a more pleasant living environment. By following expert tips and staying committed to the process, you’ll be able to declutter and organize your home effectively and enjoy the benefits of a well-organized space.
Deep Clean Each Area of Your Home
Once you have assessed, prioritized, and decluttered your home, it’s time to tackle the deep cleaning process. Deep cleaning goes beyond regular maintenance and involves thorough cleaning of every nook and cranny. Here are some expert tips to help you deep clean each area of your home:
1. Dust and Wipe Down Surfaces
Start by dusting and wiping down surfaces throughout your home. Use a microfiber cloth or duster to remove dust from furniture, shelves, and electronics. Pay special attention to often-neglected areas like ceiling fans, light fixtures, and baseboards. Wipe down countertops, windowsills, and other surfaces using appropriate cleaning solutions.
2. Clean Windows and Mirrors
Make your windows and mirrors sparkle by giving them a thorough cleaning. Use a glass cleaner or a solution of vinegar and water to remove smudges and streaks. Consider using a squeegee for a streak-free finish. Don’t forget to clean window tracks and frames as well.
3. Vacuum or Mop Floors
Deep clean your floors by vacuuming or mopping, depending on the type of flooring you have. Vacuum carpets and rugs to remove dirt and debris, paying attention to high-traffic areas. For hard floors, sweep first, then mop using a suitable cleaning solution. Pay extra attention to corners and edges.
4. Scrub and Disinfect Bathroom
Giving your bathroom a deep clean is essential for a fresh and sanitary environment. Scrub the bathtub, shower, and toilet using appropriate cleansers or natural solutions like baking soda and vinegar. Clean the sink and countertops, and don’t forget to disinfect frequently touched surfaces such as doorknobs and faucets.
5. Tackle the Kitchen
The kitchen is a high-traffic area that requires thorough cleaning. Clean inside and outside of cabinets, wiping down surfaces with a suitable cleaner. Degrease and clean the stove and oven, including burner grates and racks. Don’t forget to clean the refrigerator, both inside and out. Pay attention to the microwave, countertops, and sink as well.
6. Clean Upholstery and Carpets
Refresh your upholstery and carpets by deep cleaning them. Vacuum upholstered furniture and use appropriate cleaning products to remove stains or odors. Consider using a carpet cleaner or hiring professional services for a more thorough deep clean. Allow sufficient drying time before using the furniture or walking on the carpets.
7. Pay Attention to Detail
During the deep cleaning process, pay attention to small details that often get overlooked. Dust and wipe down light switches, door handles, and vents. Clean out the inside of appliances like the dishwasher and washing machine. Don’t forget to clean and disinfect trash cans, replacing liners if necessary.
Remember to work systematically and focus on one area at a time. Deep cleaning can be time-consuming, so be patient and thorough. Pace yourself and take breaks as needed to maintain your energy and enthusiasm.
By following these expert tips and giving each area of your home a deep cleaning, you will create a fresh, clean, and inviting space that you can enjoy throughout the year.
Maintain Cleanliness Throughout the Year
After completing your spring cleaning tasks, it’s important to establish habits and routines to maintain cleanliness throughout the year. By implementing consistent cleaning practices, you can keep your home in a neat and tidy condition without having to go through extensive cleaning sessions again. Here are some expert tips on how to maintain cleanliness throughout the year:
1. Establish Daily Cleaning Routines
Establishing daily cleaning routines will help you stay on top of regular tasks and prevent dirt and clutter from piling up. Dedicate a few minutes each day to tidy up and put things back in their designated places. Wipe down kitchen countertops, clear out any visible clutter, and sweep high-traffic areas to maintain a clean and organized space.
2. Clean Up After Yourself
Make it a habit to clean up after yourself immediately, rather than letting messes accumulate. Wash dishes after meals, wipe down bathroom surfaces after use, and put away items after you are done using them. Taking small steps to maintain cleanliness throughout the day will make a significant difference in keeping your home tidy.
Read more: How To Clean A Bathroom: An Expert Guide
3. Implement Weekly Cleaning Tasks
In addition to daily routines, establish a weekly cleaning schedule to address deeper cleaning tasks. Set aside a specific day or time each week to tackle tasks such as vacuuming, mopping floors, dusting furniture, and cleaning bathrooms. By breaking these tasks into manageable chunks and spreading them out over the week, you can maintain a consistently clean home without feeling overwhelmed.
4. Regularly Declutter and Organize
Maintaining cleanliness also involves regularly decluttering and organizing your belongings. Set aside time every few months to reassess your possessions and get rid of items you no longer need or use. Reorganize storage areas, closets, and cabinets to ensure that everything has a designated place. By keeping clutter at bay, you’ll have a cleaner and more visually appealing living environment.
5. Follow Proper Cleaning Techniques
Be mindful of proper cleaning techniques to ensure effective and efficient cleaning. Use the right cleaning products and tools for each surface or material. Follow instructions on product labels and avoid using abrasive materials that could damage surfaces. Proper techniques will yield better results and help maintain the longevity of your home’s fixtures and furnishings.
6. Get Everyone Involved
Maintaining cleanliness is a collective effort, so involve everyone in your household. Assign age-appropriate cleaning tasks to family members and establish expectations for their participation. Emphasize the importance of cleanliness and make it a shared responsibility. By working together, you can maintain a clean and organized home more easily.
Read more: What Is Spring Clean Up For Landscaping
7. Seek Professional Help if Needed
If you find it challenging to keep up with cleaning tasks or if certain areas require specialized attention, don’t hesitate to seek professional help. Hiring cleaning services for deep cleans or periodic maintenance can take the pressure off and ensure that your home receives the attention it deserves.
Maintaining cleanliness throughout the year requires consistent effort and commitment, but the rewards are worth it. By following these expert tips and establishing daily and weekly routines, you can enjoy a clean and inviting home all year round. Remember that maintaining cleanliness is an ongoing process, and the more you incorporate these habits into your lifestyle, the easier it will become.
Frequently Asked Questions about How To Prepare For Spring Cleaning: 6 Steps Experts Take
Was this page helpful?
At Storables.com, we guarantee accurate and reliable information. Our content, validated by Expert Board Contributors, is crafted following stringent Editorial Policies. We're committed to providing you with well-researched, expert-backed insights for all your informational needs.

0 thoughts on “How To Prepare For Spring Cleaning: 6 Steps Experts Take”